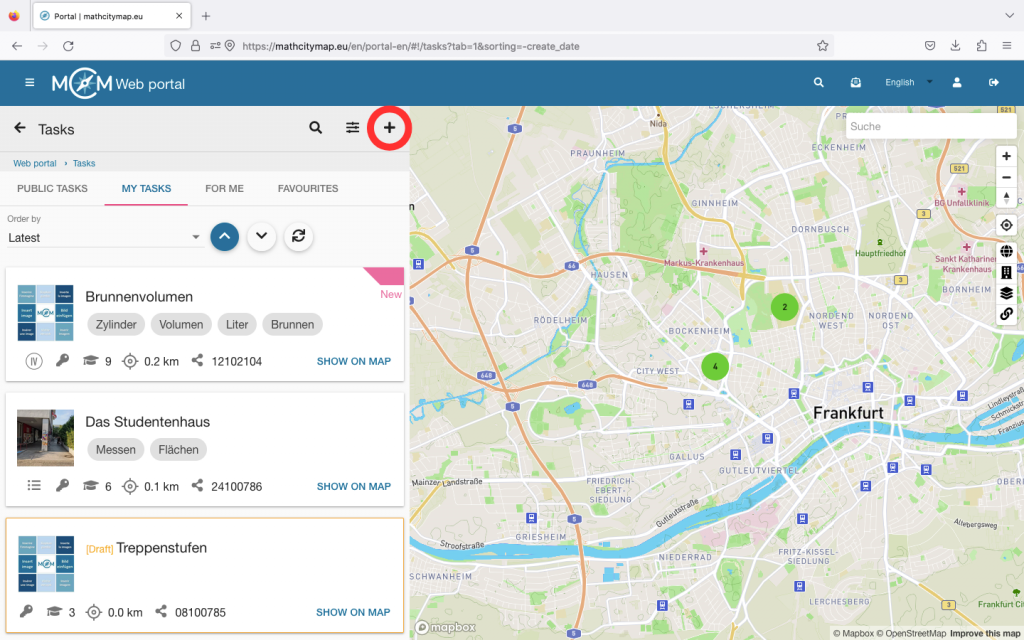
Step 1 – Open the task area
To create your own task, click on the “Tasks – Create and manage” field.
You can also click on “Tasks” in the menu bar on the left-hand side.
There is a plus symbol at the top left. Click on “New task” to start creating your task. The task will not be saved automatically, so don’t forget to click on “Create” after entering the information.
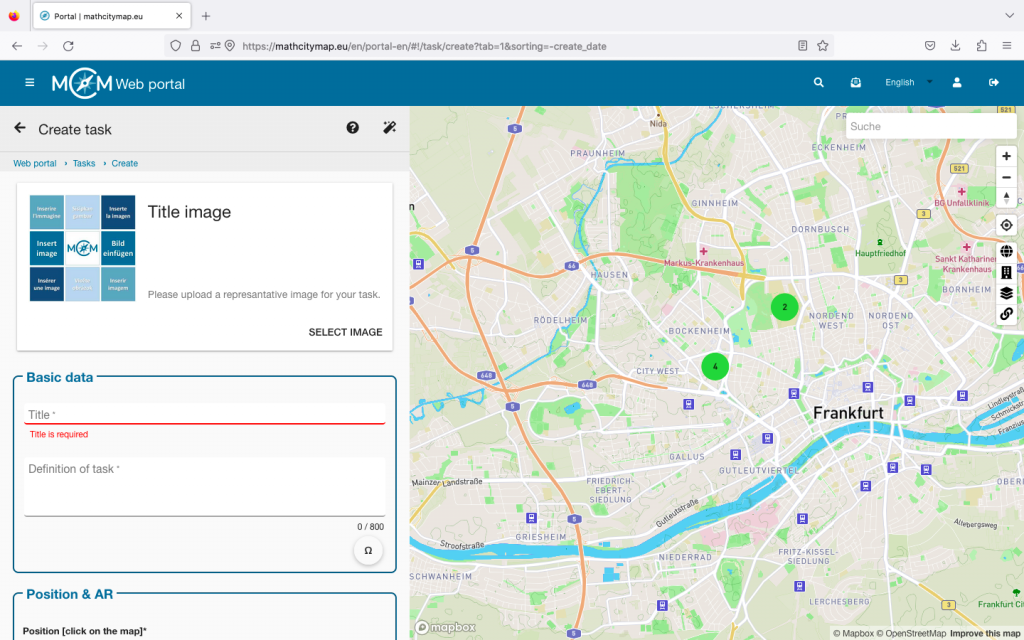
Step 2 – Enter basic information for the task
You will now be asked to enter the basic information for your task.
Cover picture: Upload a picture of the place where your task is located. It’s easiest to use the QR Code. Scan it with the smartphone that you took the picture with and follow the instructions. Make sure that the task cannot be solved by the cover image alone.
Basic data: Choose a suitable title for your task. Write down a precise definition of the task and provide all the necessary information.
Position: To indicate the exact position of the task, simply click on the right spot on the map.
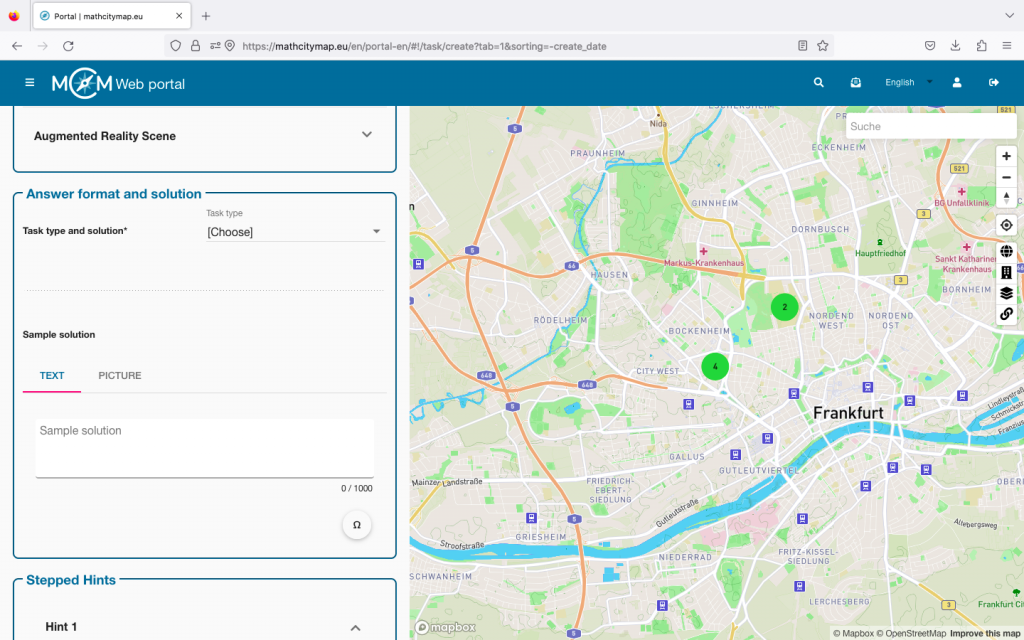
Step 3 – Answer format and solution
Various task types can be selected in the bar. Decide which format makes sense for your task.
For example, if you want to determine an exact number, it makes sense to ask for an exact value. With measurement tasks, small measurement errors can occur, so it makes sense to offer a solution interval here. Depending on the type of task, different solutions must be given.
Then provide a sample solution to your task. This can be in written form or as a picture.
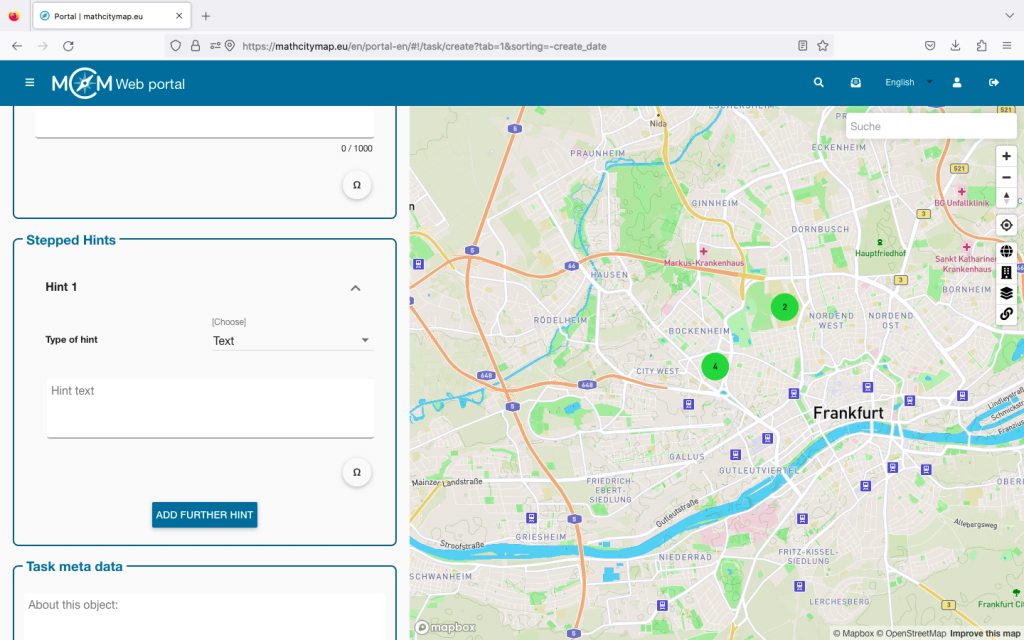
Step 4 – Stepped hints
Up to three hints can be given for a task. These can be helpful in solving the task.
They can contain an idea or an approach to a solution or even a concrete formula or direct instructions.
To do this, select the hint type and then add a text, image or video.
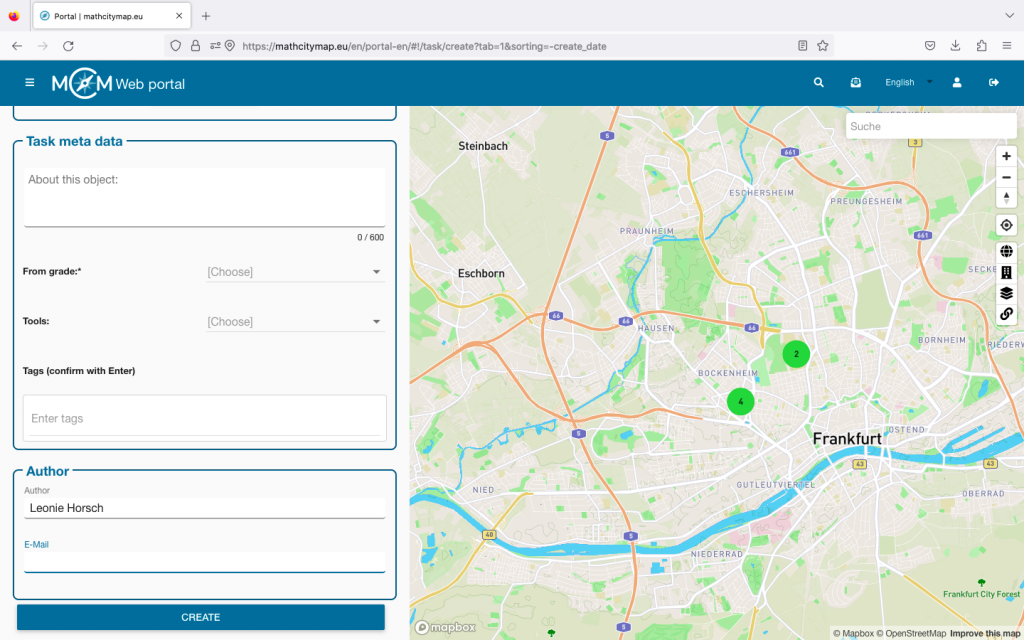
Step 5 – Task meta data
Interesting information about the object of the task can be added here. For example, you can enter the year of construction of a building or exhibition information about a sculpture.
You can also specify the grade level for which the task is suitable. This is particularly important for public tasks so that MCM users know whether the task corresponds to their mathematical abilities.
Furthermore, the required tools can be specified here, such as a folding ruler or measuring tape.
Finally, you should define certain keywords. These also help other MCM users to decide whether they want to solve the task or not. To do this, enter a term and confirm it by pressing the Enter key.
Your own name is automatically entered as the author. The e-mail address of the linked account is also listed there, but it is not visible to others. Finally, click on “Create” and your task is created in the web portal.
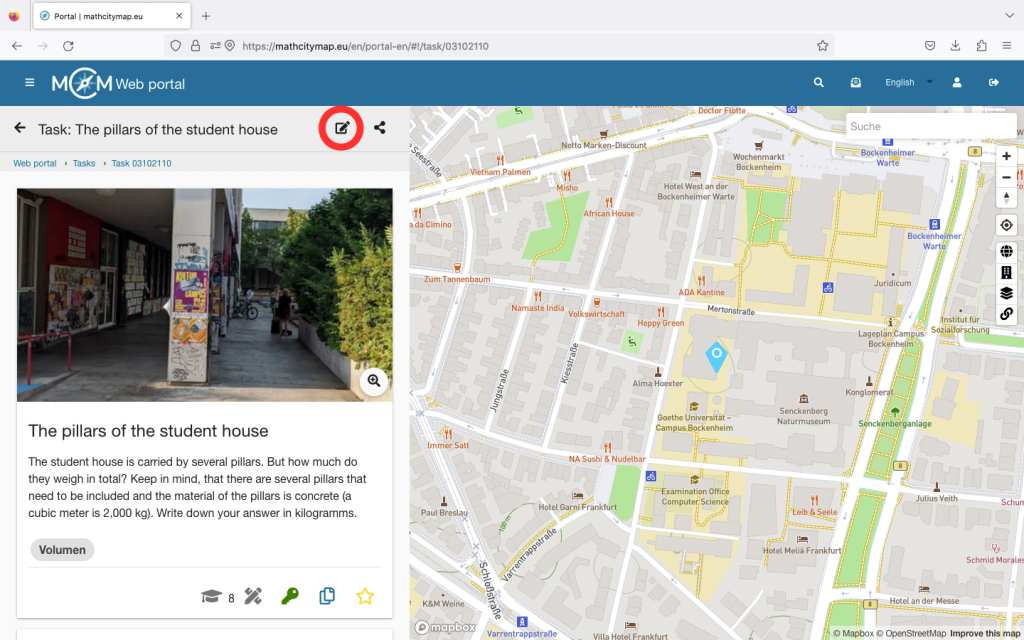
Step 6 – Edit tasks
f you want to edit your task later, go to “My tasks” via the “Tasks – Create and manage” field.
Select the task you want to edit. You will then see an edit icon at the top right. If you click on it, you can adjust the cover image, basic data, position and meta data afterwards.
Click on “Save” at the bottom to save your changes.

